
Laptop Finder
Build Or Buy- Which Is The Best Option To Get A New Gaming PC?

It was once a question that we only asked of the most dedicated gamers: build your own computer, or buy one ready-made? Today, the build vs. buy divide has expanded to include laptop buyers too.
When it comes to deciding whether you should build your gaming PC, build versus buy shouldn’t be seen as a proposition. Here is everything you need to know about why the build is the best option for gamers who want maximum power and performance – without breaking their budget.
The build versus buy debate often boils down to a choice between convenience and power. The build option offers the flexibility to build exactly what you want with no waste. Meanwhile, buying a prebuilt PC can be more convenient for beginners, as well as budget users who are less concerned about upgrading frequently.
In sum, if you’re serious about gaming and have a determination to build your own custom-made gaming system from scratch, then build is absolutely the better choice for many reasons out of the scope of this article which will be explained here below in detail.
Build versus Buy
Here is a detailed comparison between buying and building your own PC. Below are some factors that you should consider when deciding whether build or buy is best for your needs-
Why should you build your own gaming PC?
Build- Performance and Flexibility
The build option gives you the ability to build exactly what you want without any waste. When you build your own gaming PC, you’ll end up with higher-quality components that are easily upgradable in the future when your needs change. If the build takes off, it will be the first time where the build is more popular than buying.
Build: Unlimited Resource and options
Buying a prebuilt computer requires less research and planning on your part, which can be ideal if you have limited time or little technical knowledge. However, there is always room for human error when buying ready-made products. For example, companies may sell high-performance parts that don’t work well together or use build quality materials that fail in the long term this can be common with laptops. In build, you build exactly what you want using a wide selection of user-friendly tools and methods.
Build: Research Complexity
If the build is more popular than buying, as it could become, there will undoubtedly be more online resources to help novices build their own gaming PCs. However, building your own computer requires some research into which components are better for your needs-a process that could increase the likelihood of buying parts that don’t go well together. Meanwhile, buying an off-the-shelf system means choosing from a list of preselected parts without the ability to swap individual hardware components for something better.
Why should you buy your gaming PC?
Buy: Convenience Vs. Performance
A prebuilt PC is often cheaper than building one yourself, but you’ll likely get less performance per dollar spent. The build option gives you higher quality components than a pre-made computer, but the build option requires more time and research on your part to build than buy.
Buy: The right parts for you?
When you build from scratch, you’re able to build exactly what you want with no waste. However, it’s possible to create a system that doesn’t go together well when buying parts individually. For example, prebuilt systems can need updating or repair sooner than self-built ones because of high energy consumption or cheap build quality materials. Convenience costs money – if you don’t have the time to do research and planning yourself, then buy likely better for you.
Verdict: Build vs. Buy Gaming PC – Which is Best?
Building your own gaming PC is a rewarding and fun experience. The building gives you the ability to build exactly what you want, without any waste. When the build is compared to buy, the build will always be cheaper in the long run because the build prevents unnecessary waste of money on buying parts that don’t go well together. Build also has many other advantages-namely higher quality components, longer-lasting build materials, lower energy consumption, and less wasted electricity. So, if build becomes popular, then buy, as I predict it will build will become more popular than buying.
If you want to build your own PC, make sure you have all these-
- Time will tell whether build becomes mainstream in laptops or desktops at large. If this trend continues, more user-friendly tools and methods may emerge. In any case, if the build takes off, it will be the first time in many years that build has become a more attractive option than the buy.
- Buying an off-the-shelf gaming PC disrupts your budget less than build, and saves you the hassle of considering hundreds of individual specs and features. A prebuilt PC’s one-size-fits-all approach is massively convenient. However, as build shows, if you know what to look for and whom to contact, the build can bring even more benefits at a much lower cost.
- For frequent gamers who desire top performance on a budget, build is the best way to go because you’ll get a better deal on exactly what you need while avoiding waste. With build, users end up with high-quality custom parts that are easily upgradable and better for maintaining going forward. Building your own gaming PC will build up your skills, save money, and lower energy consumption.
It’s true that build is an investment of time to build a gaming PC. What’s more, build requires a bit of (rewarding) elbow grease to complete the process-from sourcing all the parts to troubleshooting along the way. This means build requires you to be very specific about what kind of gaming PC you want.
The build is also not mainstream, meaning most manufacturers don’t provide user-friendly methods or tools for including your preferred components when buying prebuilt PCs. As such, the build can involve more research into which components are best for gaming on your budget, where parts are sold, and how to build them.
Step by Step Process of building your own gaming PC
Step 1: Preparing Motherboard

This is the most important part of setting up a gaming PC. One needs to be careful a lot while preparing for a motherboard. You will find out a manual that can help you rearrange and align different parts of the motherboard. It is always advised to have some prior knowledge about different parts before setting up. However, it is advised to set up different parts on a flat surface outside of the casing.
Step 2: Installing CPU
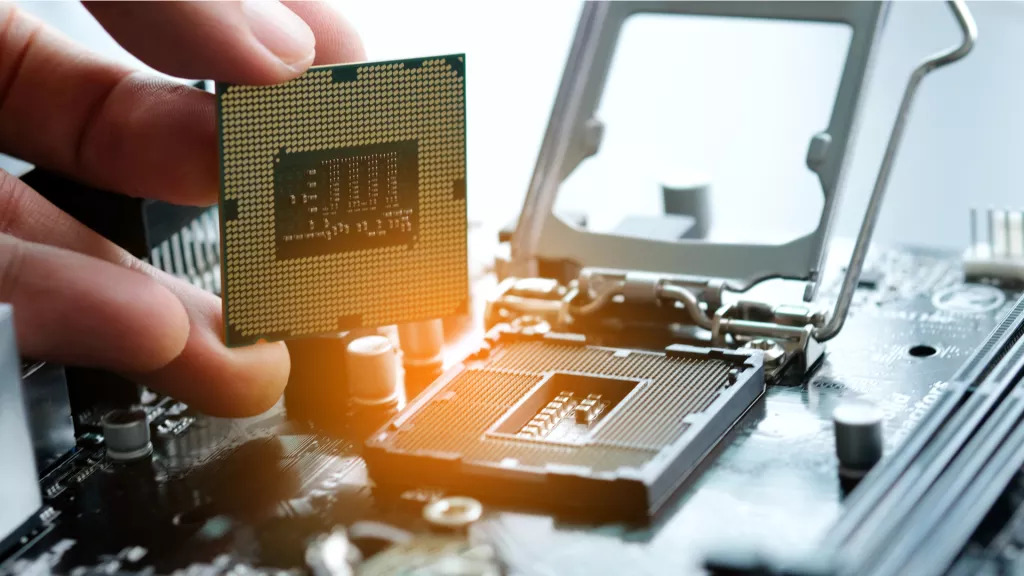
Mounting a CPU is the simplest step of the entire setup. A plastic thing will shield the CPU socket on your motherboard, which you can pull off when you open the tray. Simply lift the tray out by gently pushing it down on the metal arm of the tray. Open the socket after it’s free of the tray, and the shielding plastic will come out. Keep this plastic component in case your motherboard develops a problem since you’ll need to reinstall it before returning it to the manufacturer.
Step 3: Installing SSD(s)
SSDs are another simple step in the procedure but remember to consult your handbook to determine which slots to utilize first. Remove any protective thermal shields on your slots that your motherboard might have installed. You may now install your SSDs after removing any protections from the motherboard. These will take some force to fit into their designated slots but don’t press with much force as they should glide right in. The other end of the SSDs should be facing upside at a diagonal angle after they’re in their slots. At this stage, you’ll need to take the proper screw that came off upon your motherboard, push the SSD down and place them into place.
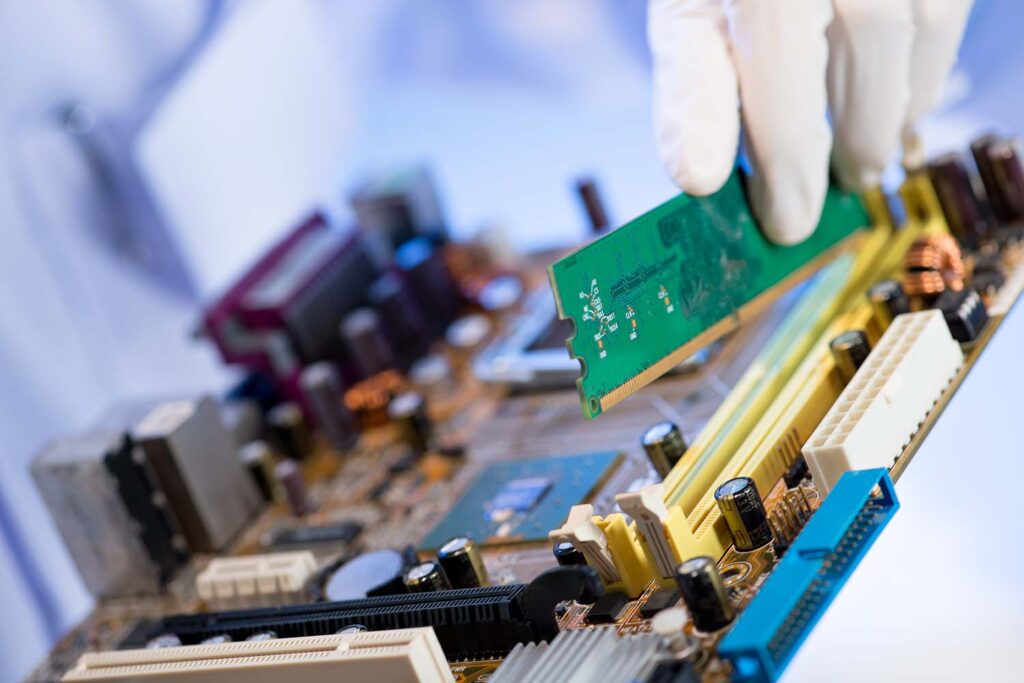
Step 4: Installing RAM
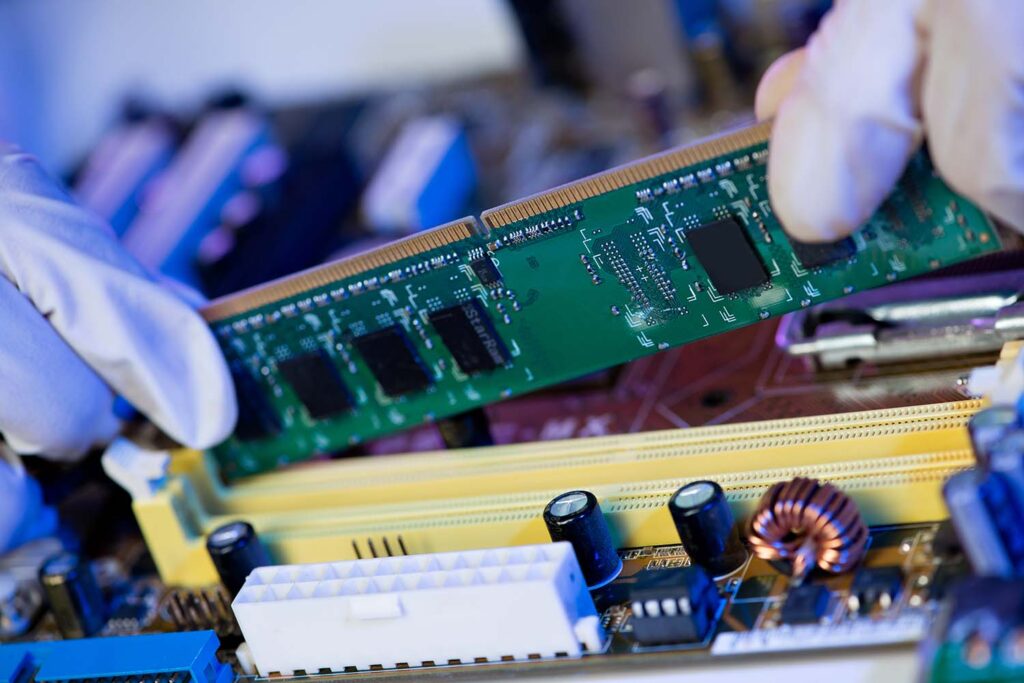
This is another stage where you might want to consult your motherboard’s documentation which should tell you which RAM slots to use in which order. At first, check the number of slots are there in your motherboard or RAM. If you have four slots but you have RAM of two sticks, you can place them with one interval to each other. The plastic clips of your RAM slot should be flipped down. Inserting the RAM needs more force, so be careful to start slowly and gradually increase your pressure. Your RAM will be in the slot if you hear a sound. The plastic clamps should pop up and grasp your RAM as a result of this. If your clips don’t flipped up, it’s possible that your RAM isn’t correctly placed.
Step 5: Preparing Casing For Motherboard

In this step, you will need to install your motherboard, but before that, you should install some standoff screws onto which you’ll mount your motherboard. These screws are generally included with your motherboard. You have to screw them with your case. The standoffs should be able to fit into roughly a dozen holes. If you’re having problems finding them, see your case’s handbook. When you are done with screwing the standoffs, you can insert the motherboard.
Step 6: Install your motherboard into your case

Stands allow you to get the motherboard in the case, but you should not begin tightening the screws right immediately. Your motherboard’s input and output ports should be able to fit into a gap on the rear of your case. When everything is in place, use the proper screws to secure your motherboard to the standoffs. Remember not to overtighten any screws. Simply tighten everything with your screwdriver, and you’re good to go.
Step 7: Installing power supply
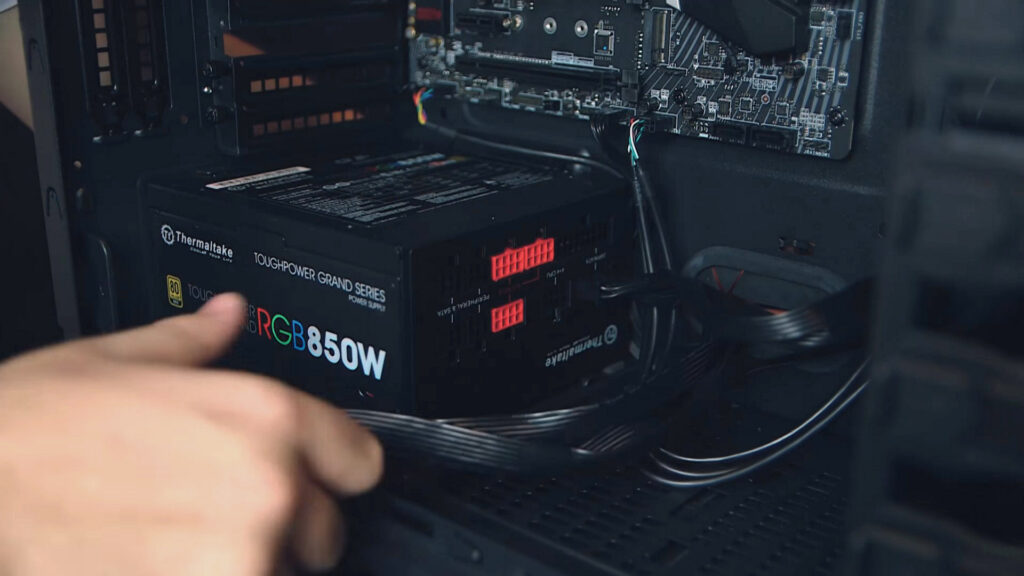
In most cases, you may install the power supply within your case. Refer to your handbook if you’re unsure, but it’s rather simple. Next, we attached our power supply’s mounting bracket to the rear of our computer case. To help with the circulation of air, you’ll also note that your power supply has a fan built-in. Depending on where you want to place your gaming PC, you’ll want to point the fan downward if it will be placed on a hardwood surface or on a desk, or you want to put the fan on the upper side if it is placed on a carpeted surface.
You will then be able to simply insert the PSU into your case and fasten the screws on the bracket. Hold off on installing your PSU until all of its different power wires are connected.
Step 8: Connecting SATA hard drives or SSDs

In this step, you can install the power supply. So, attach any SATA hard drive or SSDs to the SATA connection. First, find the location where the metal grips are located, then locate the metal grips on both sides of each bay. To release the bay, squeeze the hook and then pull it out. In this location, you can secure your SATA drive by screwing it in. You have to insert the bay and plug a PSU cable and SATA again into the hard drive after this is finished. Plug the SATA cable that connects to your motherboard. Then you have to plug in the PSU cable to the power supply. When your PC is ready, you’ll need to format your drive. Now we are ready to create some build.
Step 9: Plug in your case and power cord

Congratulations! Your motherboard is ready to be connected to your peripherals now. You will have to exercise patience here since your cables are quite small and tricky to align. Using the manuals of motherboard and casing is highly recommended when doing this step. For motherboard manufacturers, sometimes including a bus in a motherboard is beneficial for case-cable installation. This shortens the process significantly.
Using the different ports as well as the power button on the front of your PC is now possible thanks to your case cables. When you push the button, nothing will happen since you will not have plugged your PSU into the motherboard. Before you connect any connections, you must make sure that cables are plugged into their corresponding slots on the PSU and motherboard. Once you’ve connected your power connections to the PSU, you’ll have to connect your fans, SATA hard drives, and cooling system to the PSU as well.
Step 10: Installing the operating system

Windows has plenty of options for PCs. Unlike when we build our own PC, installing games and other programs is easy. However, if you’d rather build your own build or like to be in control of the build process, then Windows 10 isn’t for you. You can pick one of those versions instead.
Step 11: Installing CPU cooling system

When you start adding the thermal paste, it might seem difficult to you, but it is not that tough. You should begin by attaching the system’s mounting bracket to the motherboard. To achieve the effect you want, you’ll have to screw part of the tray of your motherboard, which is situated at the rear of it. Using this, you will be able to place the pump of your CPU and motherboard assembly where you need it. Before you proceed, there are a few further procedures that must be followed.
To ensure that your CPU gets the most efficient cooling possible, use a CPU cooling system that is possibly liquid and comes with a radiator with built-in fans that you will want to install in your computer case. You will need to determine where to put it before you begin. Installing it on the rear of the case is the only alternative if your case doesn’t have an upper grill. Once you have decided on a certain place, you will mount the radiator directly into the grill itself. In order to do this, you must connect the pump.
You should apply some heating pads beforehand. When a cooler comes with its own thermal paste, you may be able to forgo the application of additional thermal paste. If you purchased a thermal paste you’d prefer to go with; you may quickly remove the paste by wiping it off with a dry cloth. In order to do this, you should put a tiny drop of thermal paste in the middle of your CPU. In this stage, you should always work with smaller files rather than larger ones. Set the cooler into place after applying the thermal paste. Just to be safe, consider cleaning the CPU off with rubbing alcohol and a piece of dry cloth before reapplying thermal paste.
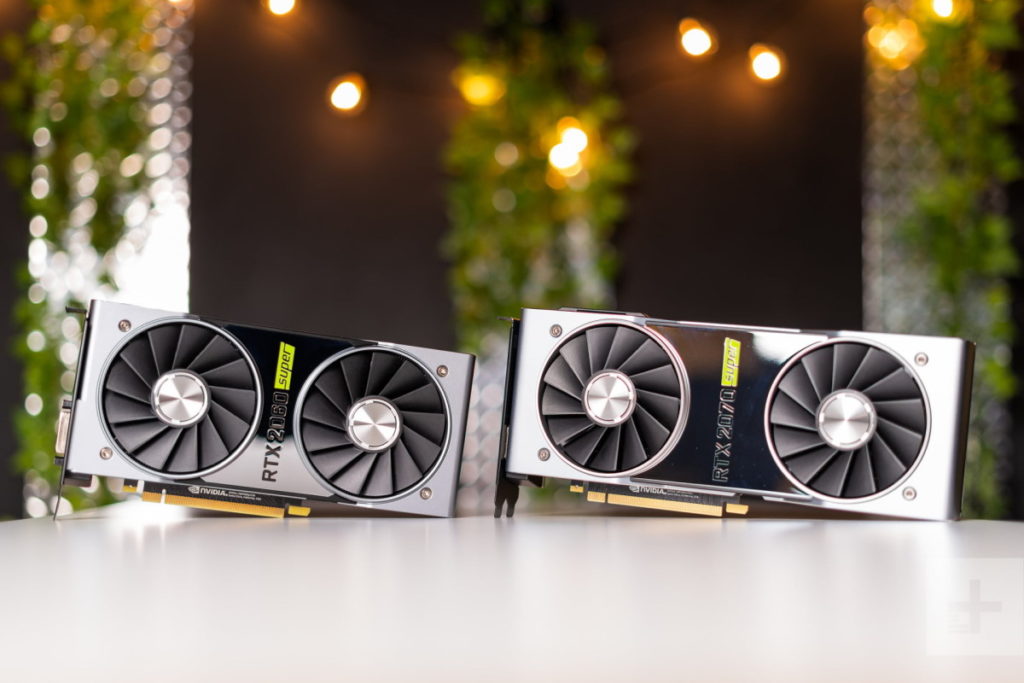
Step 12: Installing A Graphics Card

So, you have purchased a new graphics card or have it installed in your system but are not quite sure how to go about installing it. Graphics cards in the PCs come with installation instructions, which vary from one manufacturer to another. Before you decide to install the card, you should know the steps to follow in order to make the most of your card. The most important thing that you should do is back up all the data that you have on your computer, as you will need this data later on for the graphics card installation process.
For the graphics card installation to go smoothly, you must ensure that the motherboard has all the pins intact and also that the graphics card is secured properly in the slot. If you are not sure how to install a graphics card, you can take help from your friends who are experts in this field. If you want to save money, you can search on the internet for different types of graphics cards so that you can choose one according to your requirement.
There are many types of graphics cards available in the market today. If you are interested in purchasing a graphics card, then you should definitely log on to the internet and compare and contrast various cards that are available in the market. When it comes to the price, always remember that the best deals are offered online.
Step 13: Building some other stuff
Now that your build is running smoothly, it has a lot of potentials but builds often require new components to optimize performance over time. Some gamers need more than 4GB RAM, while others might want an even faster CPU. With all these possibilities, there are so many ways to make sure you get the most out of your build.
Conclusion
So, it is always a good choice to build a gaming PC to get your own customized system at less cost than buying a pre-packaged desktop or laptop. When you build from scratch, the initial investment in parts can be offset by lower power consumption and longer-lasting components that will not need updating as frequently. You’ll also save money on your electricity bill when the build is compared to buy because of surplus energy wasted with prebuilt computers.
Here is the product recommendation from us-
Motherboard
ASUS ROG Strix Z490-E Gaming Z490
MSI MPG Z490 GAMING EDGE
Asus Prime B365M-A LGA-1151
CPU
AMD Ryzen 5 3600 6-Core
Intel Core i9-10900K Desktop Processor 10 Cores
AMD Ryzen 9 5900X
SSD
WD_BLACK 1TB SN850 NVMe Internal Gaming SSD
SAMSUNG 970 PRO SSD 1TB
RAM
Corsair Vengeance LPX 16GB
v-Color 8GB (1 x 8GB)
Corsair Vengeance RGB Pro
Casing
Dark Base 700, BGW23
Corsair Carbide Series 100R
Cooler Master Cosmos C700M E-ATX Full-Tower
Power Supply
Corsair RM Series
ARESGAME Power Supply
EVGA 110-BQ-0600-K1 600 BQ
Cooling
Noctua NH-D15
Cooler Master Hyper 212 Evo
Dark Rock 4
GPU
GIGABYTE GeForce RTX 3060 Gaming
EVGA GeForce RTX 3060 XC Gaming
ASUS GeForce RTX 2060 Overclocked 6G GDDR6 Dual-Fan EVO Edition

HP 14 Pink Ultrabook Review: Is It The Perfect Student Laptop?

What is RAM And Why Is RAM Important For Your PC?

Best Laptop For Graphic Design
How to Fix Memory Leaks in Windows

Top 64 GB RAM Laptops
Top 10 Gaming Laptops for 2023: Features and Tips To Look For

The Best Projector Under $500
Best Laptop for Animation
Best Monitor for Color Grading – Reviews and Buying Guides
Best Mid Tower Cases For Water Cooling
Best Cheap Motherboard Under $100
10 Best White Gaming Keyboards
Gaming Laptop vs Desktop: Which Do You Prefer?
Best Graphics Cards Under $400 Review
Dell vs Lenovo Laptop: Which is Better?
Intel vs AMD with Integrated Graphics

The Top 10 Laptops For Teachers

Best Laptops with Backlit Keyboard for Ultimate Visibility

Lenovo vs HP Laptops
Best UltraPortable Lightweight Laptops
Best Cheap Pink Laptops Buyer Guide 2022
How To Change Your Mouse DPI In Window (7,8,10) and in MACBOOK
10 Best 64GB RAM Laptops Reviews In 2022
How to play ps4 on laptop | How to use Laptop as Monitor for PS4
9 Best Chromebook Under 100 Buyer Guide

How To Fix a Cracked Computer Screen Without Replacing The Entire Laptop
10 Best Refurbished Laptops Under 200 Buyer Guide in 2021
Lenovo vs Dell laptops Best Brand Laptops Comparison In 2021

How to Move FullScreen Game to Second Monitor
Which is better Acer or ASUS? Which Laptop Brand Is Better Review 2021
Best Cheap Motherboard Under $100
The Best Projector Under $500
Top 10 Best Laptop Under 1000
10 Best Laptops For Computer Science Students
Overwatch System Requirements
10 Top Gaming Laptops Under 800